

Here it is! Took me long enough. If there is one reality I've got to accept, it's that EVERYTHING takes longer than it should or you plan on - especially with three young boys and their friends around! So, without further ado....
Alright. I'm also putting in a disclaimer here...I'm learning as I go. This is what I did for this set and I had to redo A LOT of steps to get it right. This is based on what worked for me. If you run into problems with something, please email with questions or let me know. The only way to figure stuff out is to try it and see if it works. If I find a better way to do things or figure out one of my steps is not the best , I'll send that info along to you...all my wonderful readers:) This is also long. I tried not to be too wordy, but it's just a lot of steps - just so you know.
First, you need to get you a good piece of furniture to work on
(for CHEAP if you're going to sell it).
(for CHEAP if you're going to sell it).
Next, gather up all your materials.

Here's my list - it's a doozy!:
1. Stripper - if you want to do this.
- I only stripped the tops that I was going to re-stain.
- I don't like to use toxic stuff, so I used Citristrip. Works great!

2. Chemical resistant gloves for stripping.
3. Stripping knife or putty knife with sharp edge.
4. Electric, hand-held, finishing sander - not a belt sander
3. Lots of sandpaper and a couple sanding blocks (foam). You blow through them pretty quick.
- 60 or 80 grit (if removing deep gouges)
- 150/200 to smooth
- 400 for final smoothing...like "butter"
5. Wood conditioner...especially on cherry and some other woods. They don't like to stain evenly.
- I used Minwax Pre-Stain.
6. Stain
- I used Minwax's Dark Walnut. LOVE that color!
- Make sure it's OIL based. That can go over any existing finish. Don't let the paint guys at chain stores tell you otherwise!
- I used Zinnser Cover Stain.
- I prefer oil (I want to try chalk paint!) because it hardens better. Latex is rubbery and will always be that way even when cured.
- I used latex Behr Premium Plus Ultra primer/paint in one matched to Sherwin Williams "Creamy" color because I already had it.
- Penetrol for oil-based paints & poly
- Floetrol for latex based paints & poly
- I like to mix up a soupy mix of about 1.5 cups of water with (maybe 2 tbsp?) Folk Art acrylic paint by Plaid (made in USA!) in Coffee Bean and a tiny bit (1 tsp?) of Asphaltium.
- Careful with the second...it's very yellow. Little bit does it.
12. Fan Brushes...small and medium sizes
13. Clear Coat of some kind.
- I used Deft Clear Wood Finish on the stain - oil with the Penetrol to extend drying time and eliminate brush strokes
- Because I needed to move faster, I used Krylon's Spray Clear Coat in Satin on the body. MUCH faster, but tricky.
15. Lots of lint free rags...cloth diapers or old t-shirt scraps
16. Painter's Tape - 3M Delicate leaves a crisp line!
17. Latex gloves
18. Oil Rubbed Bronze Spray paint - I used Krylon's
19. Automobile Spray Primer - I used Rust-Oleum
20. Drop cloths
21. Spray Paint Respirator - one that filters out the VOC's
22. Safety goggles
Whew! Told you that was a lot of stuff!
Now on to the steps. Remember, I wasn't thinking of blogging when I did this so I don't have a lot of pictures. I will always take pics from now on:)
Step 1
Strip finish off. Be very careful with the knife to not gouge the wood when scraping the gel stripper off. Follow instructions on bottle for disposal and safety. Make sure to put a drop cloth under piece to catch falling paint/stripper. Wear your chemical resistant gloves. This stuff is not toxic but will give chemical burns.
Step 2

Sand top down first with rough grits to get rid of marks then progressively use higher grit to smooth out. Make sure to ONLY go with the grain, not in circles. Only go across if trying to take off layers to remove marks, but finish by going with the grain. Wear a respirator and goggles. You'll regret it if you don't...trust me:)
Step 3
Use a sanding sponge to go over all areas lightly to be painted. You might could use a deglosser/liquid sander here. I've not tried one yet. You need to give the wood some "tooth" for the primer to adhere to. Ignore anything that says you don't need to do this step. Again, trust me:)
Step 4
Wearing latex gloves, dust off the piece with lint free cloth. Then use the tack cloth to go over and get any remaining dust.
Step 5


Apply Pre-Stain or wood conditioner per instructions only to top or area being stained.
Step 6
Apply stain, being careful to keep a wet edge. DON'T let it dry before wiping off excess. Apply more coats to get the depth you want...again, don't apply a thick coat and then let it dry without wiping.
(Trust me, again!).
(Trust me, again!).
Step 7
Put Poly on top. Be careful to only use NON-YELLOWING poly, even on wood. It'll turn a different OLD color if not. Don't shake the can or use a foam brush if brushing on. This will put air bubbles in it that stay. Stir and use only a rag or poly brush. Read the instructions on the can!
Step 8
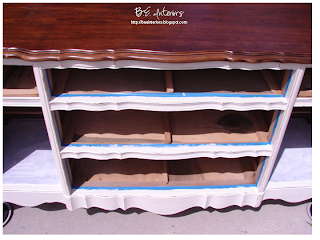


Tape off edges (see picture above). Prime the body with oil-based primer with a good bit of Penetrol added. I like mine soupy. It doesn't actually thin it. It just extends drying time and eliminates brush marks, which primer is awful about! Apply two coats. I used the medium fan brush. This is when I'd love to have a sprayer! If you have one, careful about what you put in it. I don't know about the Penetrol/Floetrol and only some paints can go in them.
Step 9
Apply paint with plenty of Floetrol (if latex). Apply as many coats as it takes to get the thickness you want. I used three - all done, AGAIN, with fan brushes.
Step 10


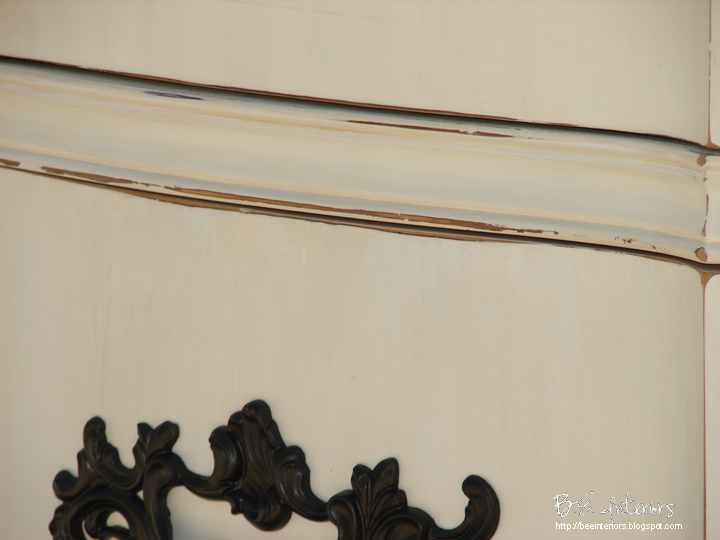


Let it all cure good. Then take the sander and using a medium grit paper, distress that baby! This is the most liberating part:) Careful not to go to quickly. Step back and look occasionally.
Step 11
Take your fine grit sanding sponge and go over all the painted areas lightly to scratch the paint so the antiquing will stick and show.
Step 12
Wipe the body down. First with a rag, then with a tack cloth.
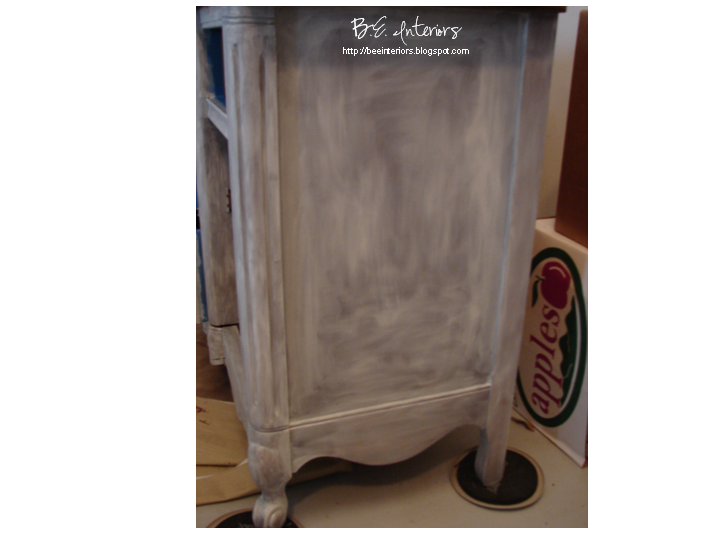
Step 13
Using your antiquing medium, dip your fan brush or a paper towel in lightly and then wipe over surface. You might want to practice this on something else first. You kind-of have to get a feel for how to wipe it on. It needs to be a little streaky, not solid, so don't overlap much...if any. Immediately wipe off with a dry paper towel. The paint will settle into the "scratches" you made with the sanding block and distressed areas, as well as leave a thin stain layer. The longer it is left to dry, the darker it is. If some spots are too dark, simply take a wet paper towel and go over them. That's the great thing about this medium. You can wipe most off with water and a towel! It's more forgiving than using a stain.
Step 14
After all paint is dry (don't rush this), spray the body with Krylon's Clear Coat. Give it about 5 layers! This is the tricky part. If there is any wind, you can get dust/dirt particles in your clear coat and it will show on white! If you have a respirator and can make a paint tent with plastic, do so. You also have to be very careful to move in a steady motion across the body. Start off the body and move across to finish off the body. Don't start and stop while holding over the body - makes shiny, heavy spots. Don't worry if it's rough feeling. The next step fixes that as well as any "uneven, shiny" spots. Kate over at Centsational Girl has some great facts on spray-painting like a pro.
Step 15

Using the finest steel wool you can find (0000), rub the body down evenly. (Um...this is making me want a massage!) Look at your piece with the light on it from different angles so you can find the shiny spots that need to be "buffed" out afterwards.
Step 16
Dust it down again with a rag or duster. You're done with the furniture part!
Step 17
Clean any hardware you're keeping with warm soapy water, then wipe it down with mineral spirits while wearing gloves to get rid of any oils. DON'T handle bare-handed. This leaves oil on it again.
Step 18
Spray with Auto Primer. Don't go too heavy. Do light coats to get it solid or you'll have drips.
Step 19

Spray with Oil Rubbed Bronze. Again, easy does it. Attach when dry. Touch up any areas dinged with Oil Rubbed Bronze sprayed into a puddle and applied with a Q-tip. When dry, attach.
Step 20

Remove tape. You're finally done!
Oh... My... GOODNESS! See, I told you it was a lot of work! But, so well worth it in the end. You'll be incredibly proud of yourself afterwards. Now, go to it "and may the force be with you"!
Miss Bee


No comments:
Post a Comment