 |
| via http://www.clars.com/ |
If you read my blog, you know one of the things I love to find at yard sales and thrift stores is old silver pieces. It's a southern girl thing...one Paula Deen talks about in her Savannah Style book that I just blogged a review of here. The only thing about silver is TARNISH! Now, sometimes I actually like the patina and wouldn't clean them if I had to. Other times, it is so bad it needs some help.
 |
| Silver Candelabras and crystal shakers found out "sailing". |
Another thing you might have picked up on is that I try to avoid chemicals and harsh fumes. That is a result of getting a degree in Graphic Communications, which deals with the printing industry. I'll never forget reading an article in grad school about how women in that industry who had direct contact with all the chemicals had one of the highest rates of birth defects with children! Yikes! I haven't researched this, but I am nearly positive it's true just from my personal observance of all the "stuff" that has to be used in printing. That was enough to make sure I got a job on the other end of the spectrum dealing with the graphics, advertising and sourcing.
I digress. The reason for that statement is that one of the things I am leery of is household cleaners. Trouble is a lot of the "natural" solutions just won't cut the grime. So, when I googled "natural silver polish" I was not expecting anything like this to work, but thought I'd try anyway. Lesson learned! The first thing I found was this link: Natural Tarnish Removers. It's a recipe for electrolysis cleaning. Say what? Yep. A large pot of boiling water, baking soda, salt and aluminium foil - cleaning by electrolysis. Who knew?!
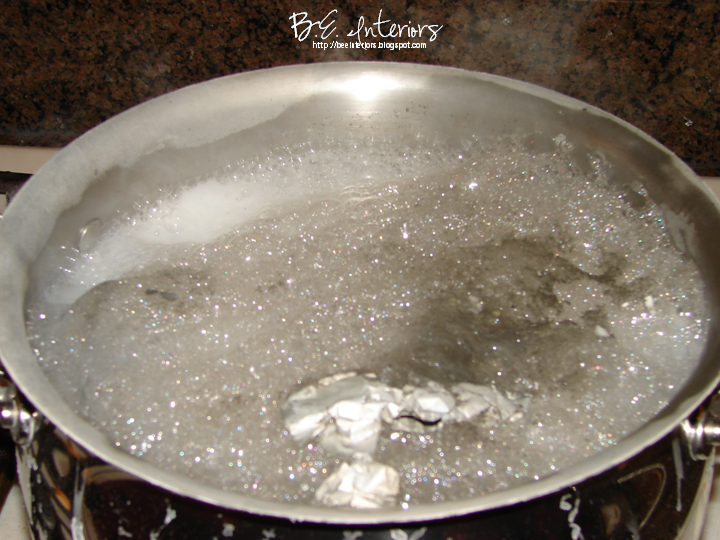 |
| My "magic" stainless pot! |
The crazy thing is IT WORKS! Check this out. Here's one of my pieces that has DESPERATELY needed cleaning:
 |
| One of my family pieces of silver "Before". |
 |
| After! Amazing! |
When I cleaned it, I just dumped a little baking soda on and some water to make a paste and lightly rubbed the detailed areas. Lastly, I washed with soap and water. No scrubbing involved! Is that not just the coolest thing ever?!
I will caution you, though. I put this gorgeous piece in [that I found out treasure hunting and LOVE] that was made in Boston in 1925.
 |
| "Before" |
 |
| "After" |
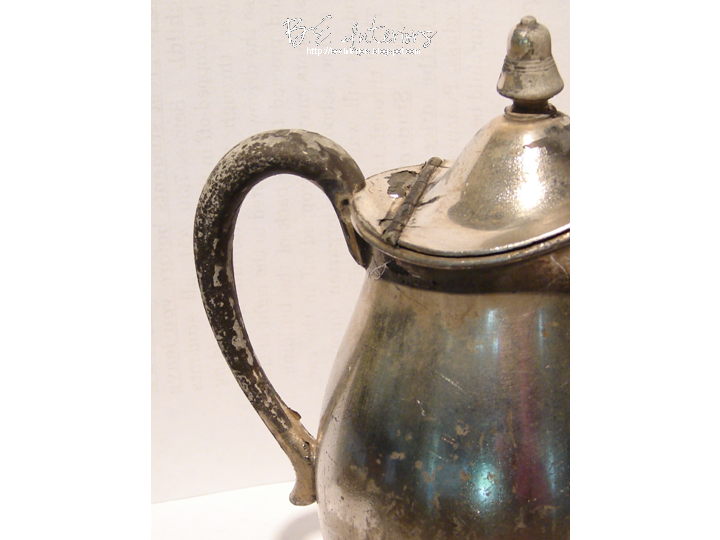 |
| See what happened to the handle and lid? |
Don't do this with pieces that are really scuffed up. I think it must let the water get under the silver which causes it just to lift off. I'm guessing here. Be careful how long you let a piece boil, as well. This creamer pot was in there for about 15 minutes because it was so tarnished. Too long, apparently. The water can only handle a few pieces that are badly tarnished before it has to be changed out. The aluminum foil on the bottom begins to disintegrate. If you look in the boiling pot picture you can see a mixture of the disintegrating foil and silver leaf that is floating on the top. Oops!
Overall, this is a fantastic way to polish pieces in good shape. Just don't go too long without pulling them out to check on the status. If stuff starts floating....STOP! Happy polishing!


No comments:
Post a Comment